
One of the challenges for our garden overhaul is how much of the original garden to keep the same, and how much to change. This post shows how we added in a water harvesting feature (a mini swale) within an existing landscaped area, to enable the establishment of new plants - some local bush tucker species!
There are some attractive and well established ornamental and native shrubs that clearly provide habitat for a wealth of beneficial insects and fodder for visiting parrots. And they survive without any input or watering from us, which is a winner. These 'ecological services' are something we don't want to lose, so there are parts of the garden that we plan to keep as is.
One example is in the front garden - it's a raised semicircle with attractive rocks and boulders, with a callistemon, two proteas and some kind of melaleuca. Seaside daisies and a couple of Hardenbergia tumble over rocks - as did a grevillea poorinda royal mantle until we had 2 days of over 40 degrees in January and it suddenly died. We also have rather a lot of osteospermum daisies (African trailing daisies) which are taking over and need taming. They're bordering on noxious weed status and these have self seeded from s naighbouring property - but they provide good bee fodder in spring as well as covering bare ground where little else will grow. And they're pretty. I plan to slowly remove and replace them, but better to have ground cover than bare earth in the meantime.
One example is in the front garden - it's a raised semicircle with attractive rocks and boulders, with a callistemon, two proteas and some kind of melaleuca. Seaside daisies and a couple of Hardenbergia tumble over rocks - as did a grevillea poorinda royal mantle until we had 2 days of over 40 degrees in January and it suddenly died. We also have rather a lot of osteospermum daisies (African trailing daisies) which are taking over and need taming. They're bordering on noxious weed status and these have self seeded from s naighbouring property - but they provide good bee fodder in spring as well as covering bare ground where little else will grow. And they're pretty. I plan to slowly remove and replace them, but better to have ground cover than bare earth in the meantime.
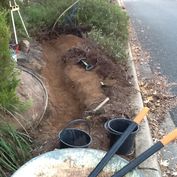
Part of the area before I got to work. The brown branches are from the dead grevillea.
Itching to get into the garden and get going on something while my partner and I were yet to agree on all elements of our overall design, tidying up this area was a good place to start! And, as it turned out, it also turned out to be an unanticipated opportunity to try out some earth works and get in some practice before doing the big stuff in the back garden.
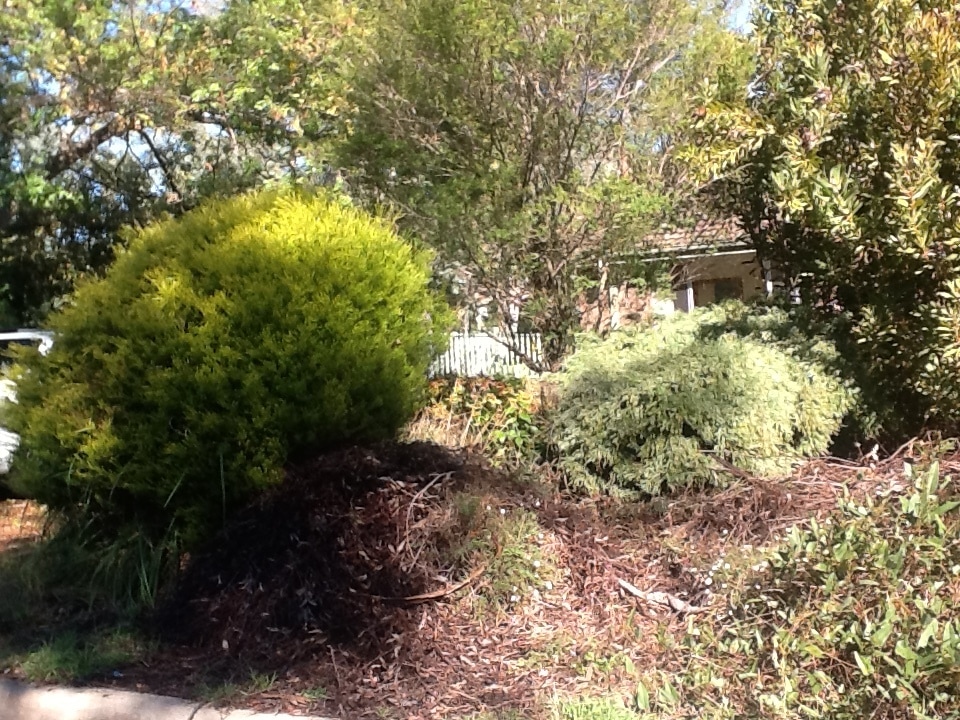
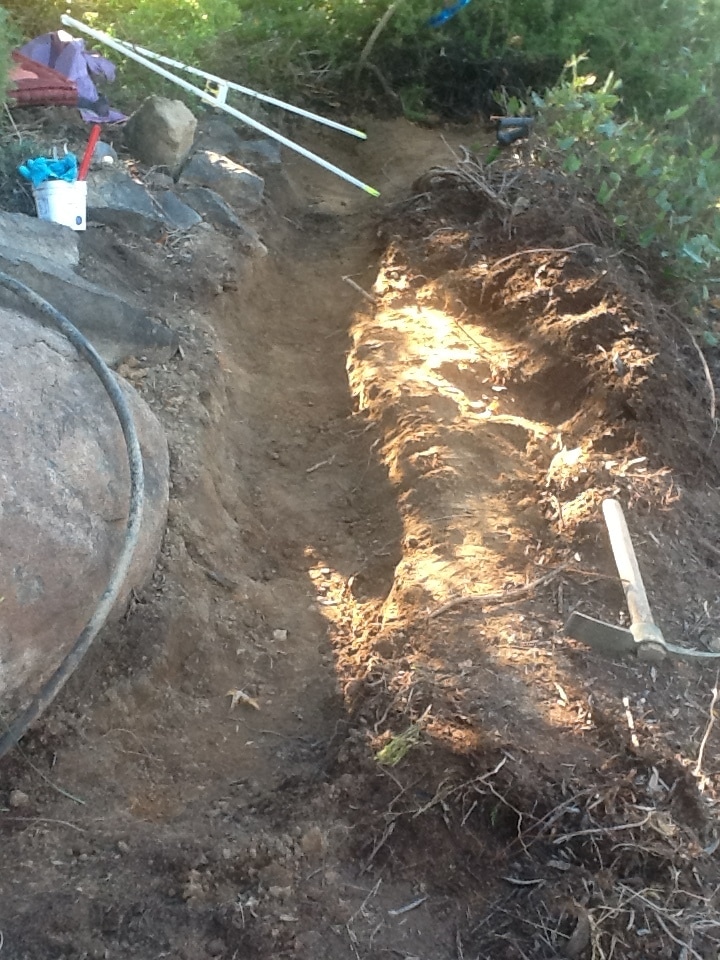
I got out my trusty loppers and started taking out the dead grevillea - and discovered a huge boulder that was completely covered. We had no idea it was there! It turned out there was quite an impressive row of feature rocks along the road side of this area. Clearing off the dead plant I discovered some lovely soil and organic matter that had clearly been building for many years. It was all slowly falling down the slope, catching in plants lower down and building soil. But I could also see that in heavy rain, the slope towards the street meant run off of precious rainwater (and potentially some of that new soil too) into the street.
I got out my trusty loppers and started taking out the dead grevillea - and discovered a huge boulder that was completely covered. We had no idea it was there! It turned out there was quite an impressive row of feature rocks along the road side of this area. Clearing off the dead plant I discovered some lovely soil and organic matter that had clearly been building for many years. It was all slowly falling down the slope, catching in plants lower down and building soil. But I could also see that in heavy rain, the slope towards the street meant run off of precious rainwater (and potentially some of that new soil too) into the street.
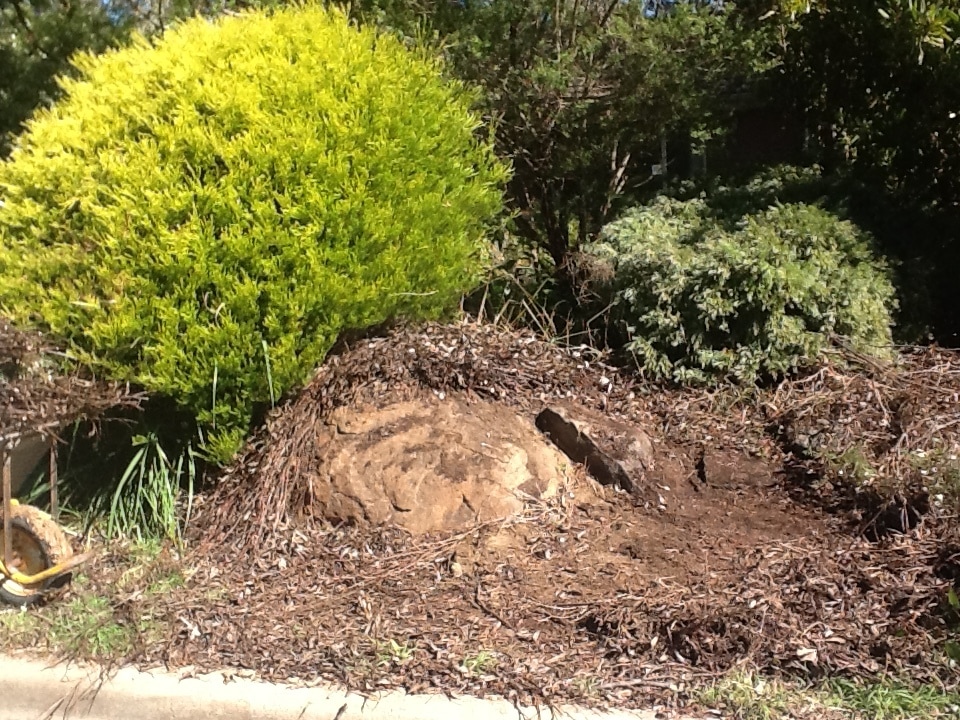 Pruning back the dead branches of the grevillea starts to reveal a large boulder (above). Some additional rocks come into view after scraping back the mulch and soil that had built up on top of them (right). | 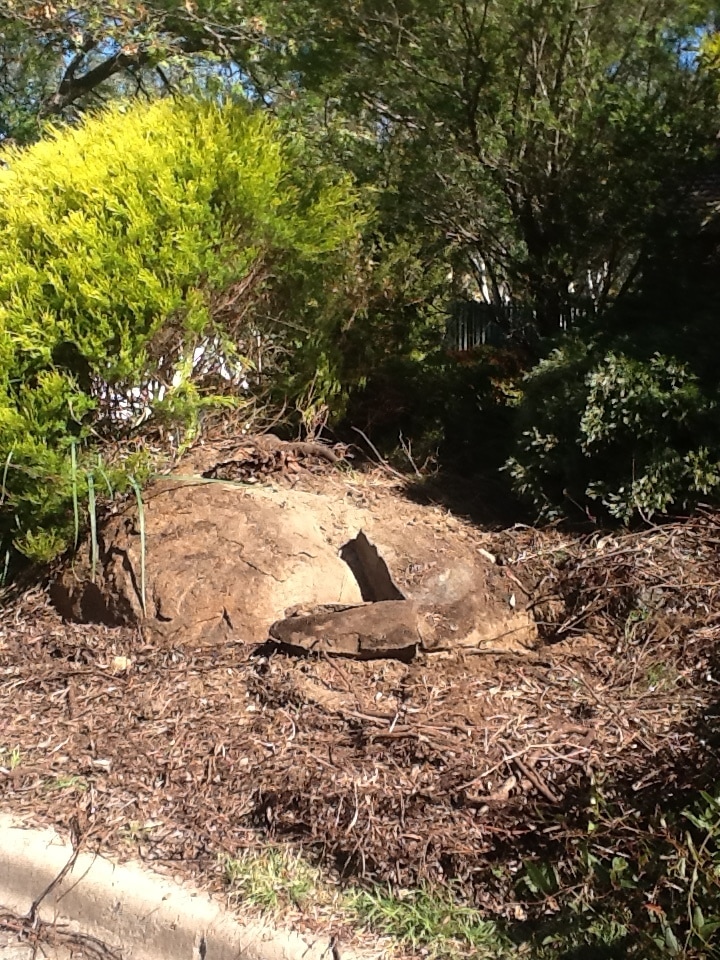 |
Uncovering the rocks provided an opportunity to make a small water harvesting swale along their base that would capture this runoff and let it seep into the soil instead of it flowing off. This swale should become a little moist zone that will take a very long time to dry out, even in hot weather. My aim is to avoid having to do any watering unless absolutely necessary - and the soil is a great place to store water (and much cheaper than a tank!)
I was curious to see how hard it would be to dig through the clay, but at this time of year it wasn't too bad, though it did get harder and drier the deeper I dug. My advice for anyone trying this sort of thing - start small, persevere and have patience! I used my mini mattock, got comfy on a cushion and got digging. I also moved the topsoil to one side, because it's good to keep that to put back on top of the earthworks after you have finished.
I was curious to see how hard it would be to dig through the clay, but at this time of year it wasn't too bad, though it did get harder and drier the deeper I dug. My advice for anyone trying this sort of thing - start small, persevere and have patience! I used my mini mattock, got comfy on a cushion and got digging. I also moved the topsoil to one side, because it's good to keep that to put back on top of the earthworks after you have finished.
 Starting on the swale, my fave digging tool, a mini mattock in the foreground to the right. (Note - photo taken from opposite direction to pictures at top) |  After a bit more digging and mostly levelled. A-frame in background. |
The important thing with a swale is to make sure it's level - as much as practical at any rate. Then in rain, the water can evenly fill the swale, rather than pooling at one end - thereby evenly watering all plants in the vicinity and not just a select few. Because of the slope and the existing landscaping in this case, it meant I needed to dig the trench slightly deeper and one end (the up hill end - in the foreground in the above pictures) than the other. Making a swale level is a bit tedious and involves scraping it as level as you can with the mattock, walking along it to see if it feels level to walk along, and then finally, when it seems pretty good, using some handy tools to check it's really level (it's amazing how often things that look level aren't really level at all!).
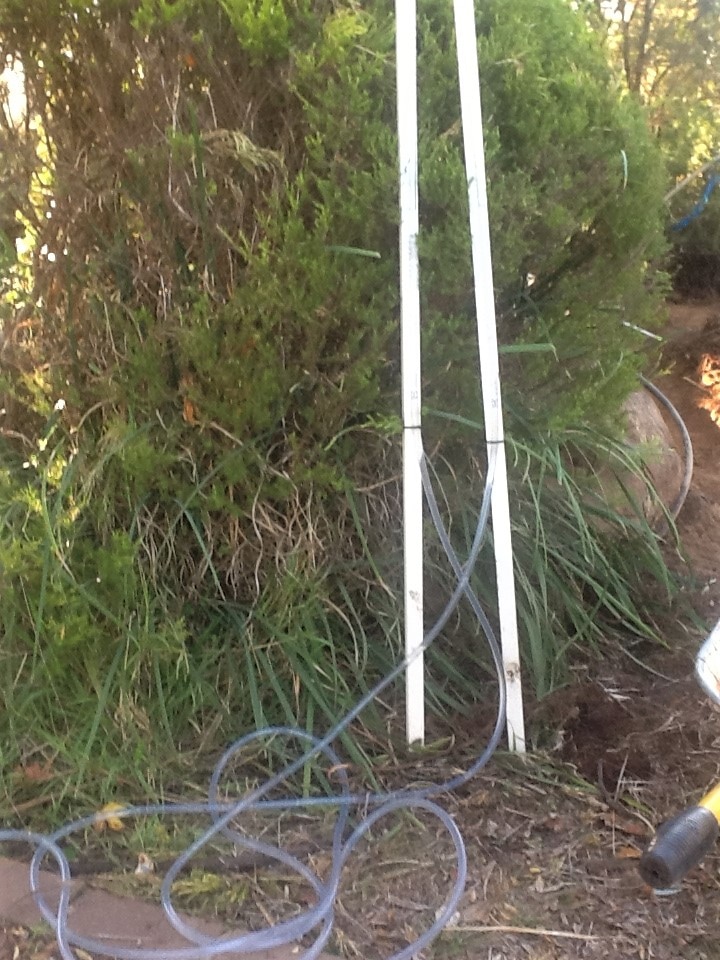
Two really useful pieces of equipment are an A-frame and a bunyip or water level (pictures below). Both can be made quite simply at home for very little expense and really not much effort.
With the A-frame, I attached a builder's spirit level to the horizontal strut, so if both legs are at the same level then the little bubble shows it. It's a case of moving it along the trench and checking that the bubble stays level, remembering where you placed each foot so the next measurement starts where the last one finished. Of course, it only shows whether the two feet are level at any one time, so it's possible to get a bit out by the time you've moved all that way along the trench - especially a narrow one like this. That's where the bunyip level is really handy.
The bunyip level is just two sticks the same height, joined by a transparent hose (mine is 15 metres long I think). It works because you glue a tape measure onto each stick at exactly the same height on each stick, so you can check the water level on each stick - if both sticks read the same number, they're level with each other. If there's a difference, they aren't - and the difference between the two numbers is the difference in height between the two sticks (and hence difference in height of the ground). A bunyip level can be used by one person for very nearby measuring, but you need two people to use it over any distance.
 Bunyip level (Sorry the picture is a bit blurry - it was a quick snap on the ipad) | 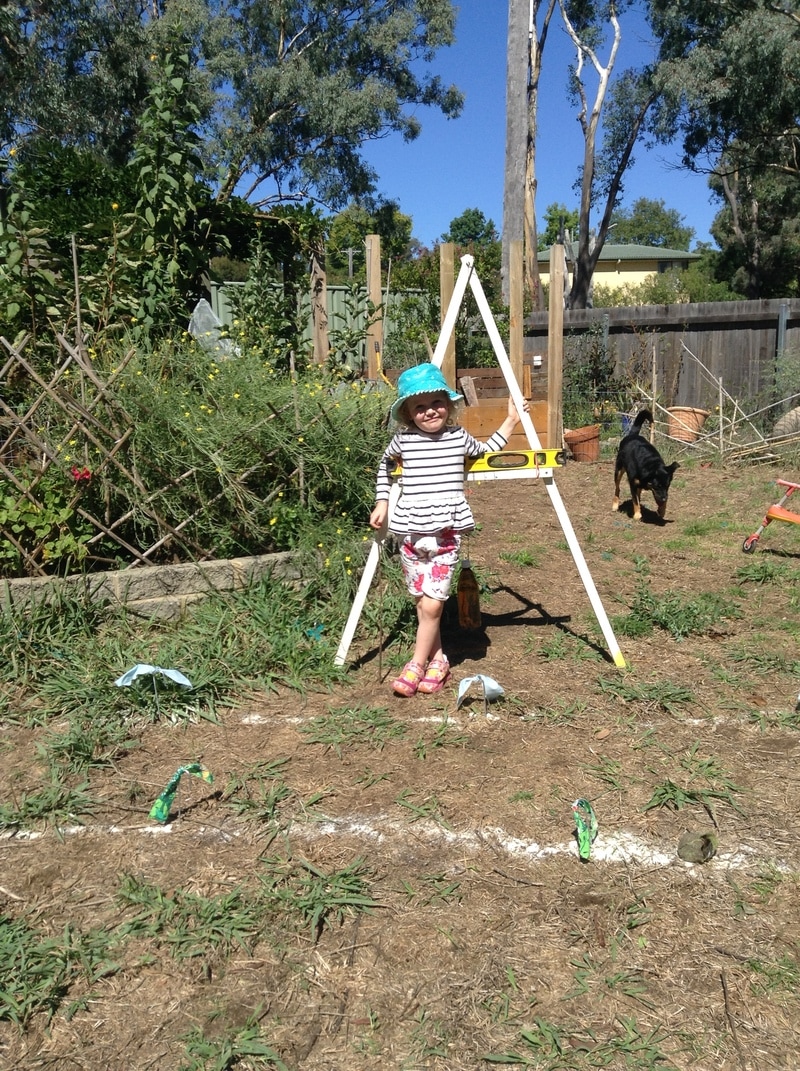 Our daughter shows off the A-frame, with builder's level attached to cross piece. |
A really important part of any water harvesting earth works like this is to test it out by filling it with water - this is the ultimate test of how level the trench or swale actually is! About half way through I decided to see how level I had made the swale using just the A-frame, and you can see from the pictures below I still had a bit more work to do!
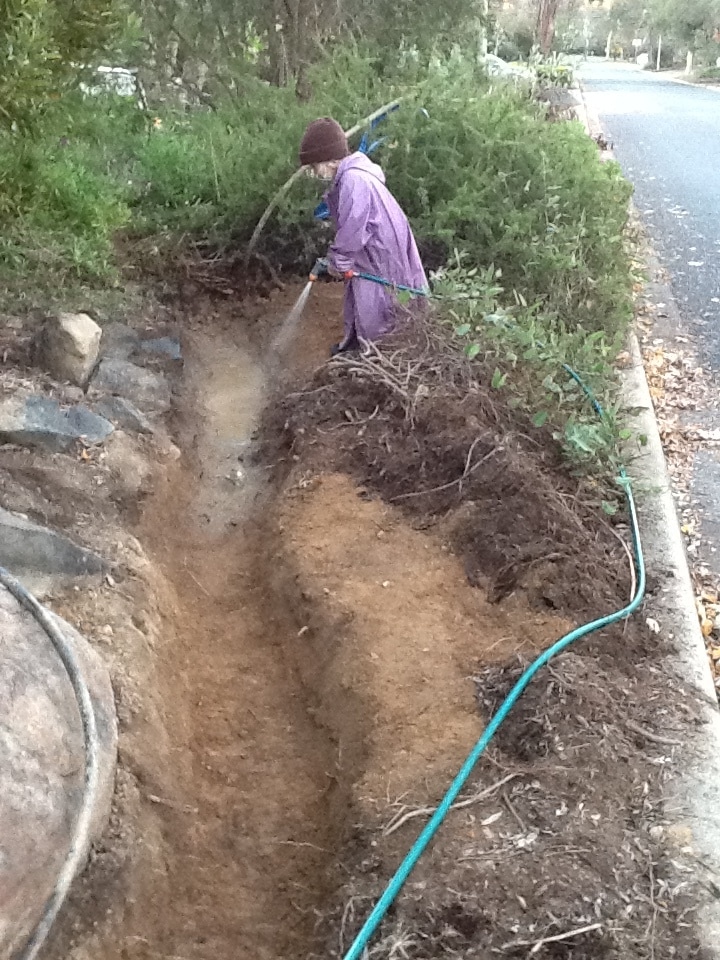 Our daughter starts to fill the swale with water | 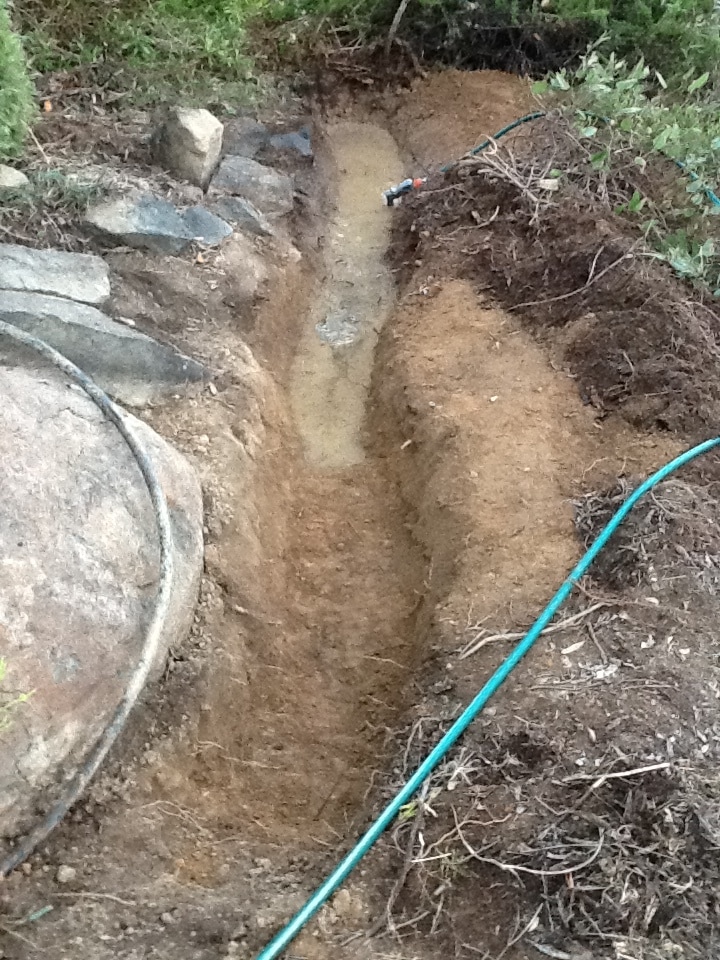 Filling it a bit more and it's clear that it's not yet level - the end in the foreground was about 5cm higher than the other end. |
In Canberra's clay soils, filling trenches with water has the drawback of the time it takes for the water to drain away! But thankfully this had all drained away in 12 hours, so I could do some more digging the following day to get it properly level - this time we double checked it with the bunyip level and things were looking good!
Although it's not visible in the above pictures, this swale has an overflow point - every swale needs one. It's at the back so should it ever fill up during an exceptionally heavy downpour, the excess water will gently drain into the bush behind. A swale like this shouldn't fill up all the way to the top - just enough to harvest some water, but not so much we're in danger of breaching the downslope berm (the 'wall' along the right hand side of each picture above).
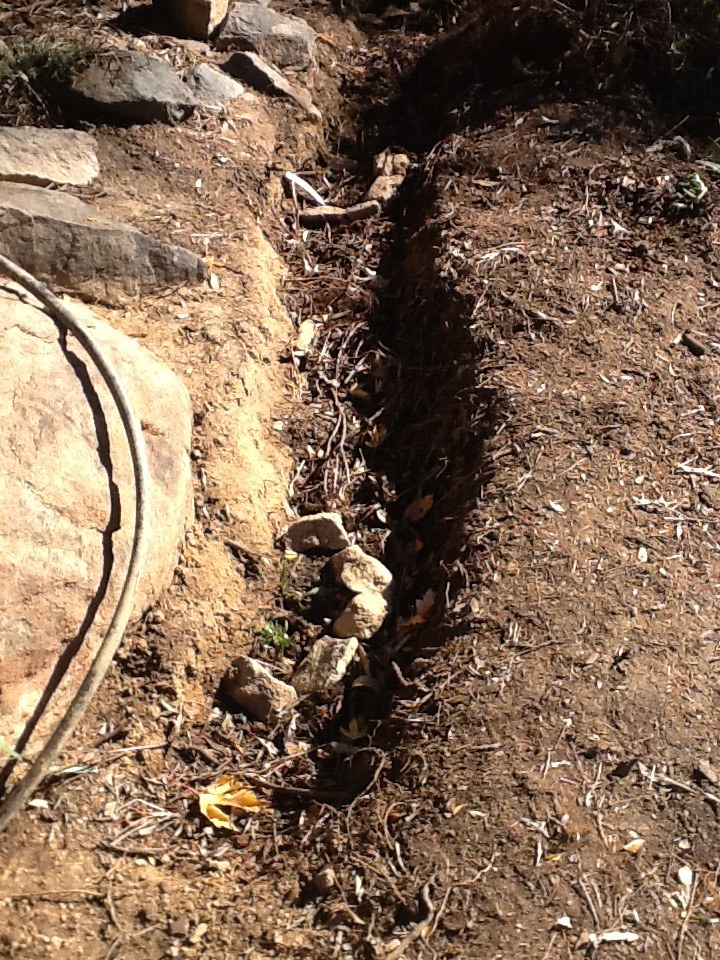
The next steps were pretty quick. Firstly, I roughed up the base of the swale with the sharp point of the mattock to reduce the compaction from walking along it. We want it to be moist but not likely to hold water for too long so plants don't get too wet.
Second, I took the organic mulch that I'd saved (you can see it on the right hand side in the pictures above) and put it into the swale, and covered as much of the surrounding earth too. Because this is typically a pretty dry bit of the garden and the swale won't collect much water from up slope (which is only a small area) I planted directly into the swale - into the mulch and humus, above its base (after getting the base so level, I didn't want to spoil it by digging deeper into it! Using plenty of organic matter in the base of a swale should ensure that plants in there are moist but not waterlogged.
I planted some river mint (mentha Australis), pale vanilla lily (arthropodium milleflorum) and yam daisy (microseris lanceolata) to make this a little bush tucker track. They're so small I had to put rock markers around them so I know where they are! It's an experiment to see whether they like the conditions, but I hope that they will cope without much input now I've got their water sorted - this is a part of the garden that we often ignore. Will post an update on how it goes later in the year!
Although it's not visible in the above pictures, this swale has an overflow point - every swale needs one. It's at the back so should it ever fill up during an exceptionally heavy downpour, the excess water will gently drain into the bush behind. A swale like this shouldn't fill up all the way to the top - just enough to harvest some water, but not so much we're in danger of breaching the downslope berm (the 'wall' along the right hand side of each picture above).
The next steps were pretty quick. Firstly, I roughed up the base of the swale with the sharp point of the mattock to reduce the compaction from walking along it. We want it to be moist but not likely to hold water for too long so plants don't get too wet.
Second, I took the organic mulch that I'd saved (you can see it on the right hand side in the pictures above) and put it into the swale, and covered as much of the surrounding earth too. Because this is typically a pretty dry bit of the garden and the swale won't collect much water from up slope (which is only a small area) I planted directly into the swale - into the mulch and humus, above its base (after getting the base so level, I didn't want to spoil it by digging deeper into it! Using plenty of organic matter in the base of a swale should ensure that plants in there are moist but not waterlogged.
I planted some river mint (mentha Australis), pale vanilla lily (arthropodium milleflorum) and yam daisy (microseris lanceolata) to make this a little bush tucker track. They're so small I had to put rock markers around them so I know where they are! It's an experiment to see whether they like the conditions, but I hope that they will cope without much input now I've got their water sorted - this is a part of the garden that we often ignore. Will post an update on how it goes later in the year!
 Not much to see yet, but encircled in the foreground is a little yam daisy plant. |  Same direction as picture on left, taken about half way along. The plant in the distance is river mint, Australia's native mint. Like all mints, it likes water. |
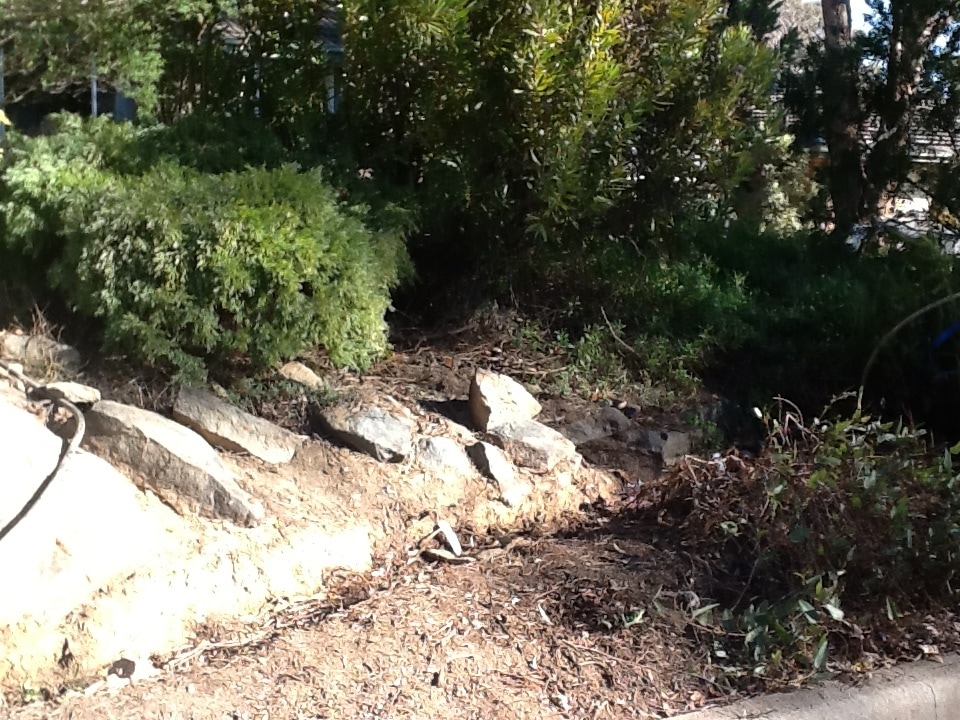
View from the road along most of the length of the swale in the morning sun (it faces east). The rocks are a little bare and need a bit more work and we'll plant the crevices with more dry tolerant species like native pig face (carpobrotus rossii) and succulents.
You might be wondering how long all of this took - hand digging in clay is not fast, especially for puny people like me who can't wield a full-sized mattock without doing my back in! It total it took me about 7 or 8 days, working for about 2 hours each day, so I guess that's about 16 hours in total, including the removal of the grevillea and general tidying up before I started digging. I've been recovering from a chesty cold so have not been pushing myself very hard - but it's been a great feeling to see something through to completion. It guess the point is, if you start something, make it small enough to be manageable and you'll be really pleased to see what you can achieve!
One of permaculture co-founder David Holmgren's 12 principles is to seek small and slow solutions and I guess this is very much a version of that. Fingers crossed, this one works like it should. I'll keep you posted!
One of permaculture co-founder David Holmgren's 12 principles is to seek small and slow solutions and I guess this is very much a version of that. Fingers crossed, this one works like it should. I'll keep you posted!
 RSS Feed